Colors are passion, emotions and personality. At Siegwerk, inks and coatings are our specialty and we use color to bring the packaging and products of our customers to life.

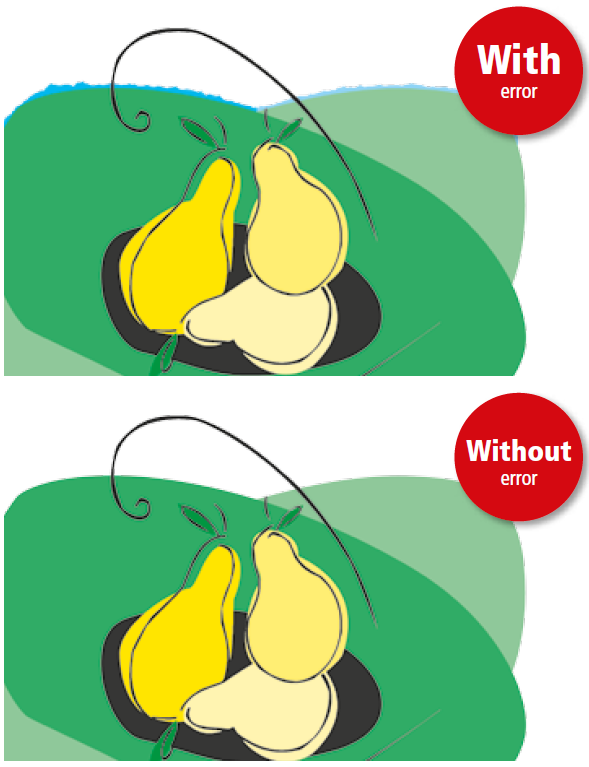
The terms bleeding or smudging are used in situations when colored constituents of the printing ink become visible in parts of the motif which have not been printed. (The previous ink must be dry enough to be able to absorb the ink that is to be applied subsequently).
| Causes | Remedies |
| The relative humidity is too high. Condensation of water into the solvent-based ink. | Use fresh ink. Adjust the solvent mixture. Increase the performance of the dryer and check the water content of the solvent. |
| Too much retarder has been used. | Replace the ink with fresh ink. Use a faster solvent for the purposes of reduction (accelerated drying). |
| The ink viscosity is too high. | Add solvent to reduce the viscosity. |
| The transferred volume is too high. | Replace the anilox roller. |
| The printing speed is too high. | Reduce the printing speed. Increase the drying speed of the ink. |
| Unsuitable colorants have been used in the printing ink. | Create a new recipe to replace the undesirable colorants. |
| There are too many ink layers on top of one another. | Reduce the layers. Design a new printed motif. |
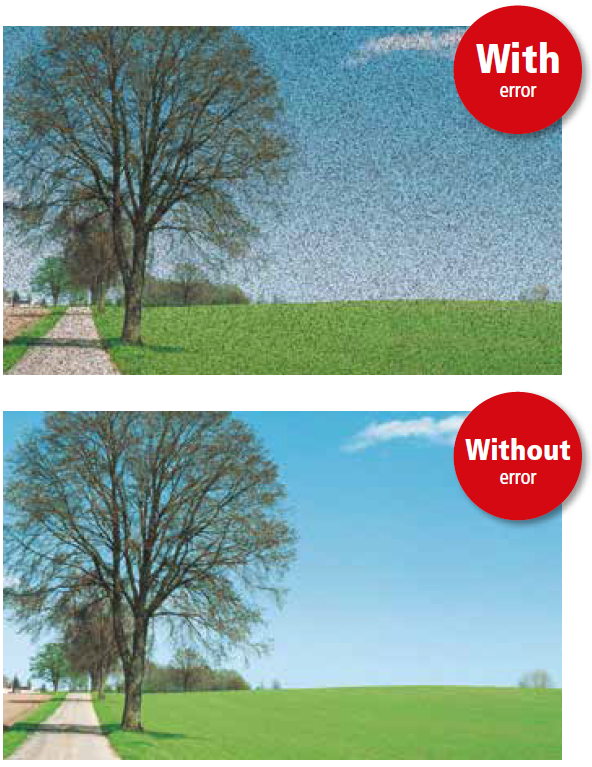
The ink adheres to the reverse side of the film and causes damage when the substrate is unrolled.
| Causes | Remedies |
| There is too much retarder in the ink. | Replace the ink. |
| The film temperature at the winder is too high. | Reduce the temperature of the tunnel dryer and check whether the cooling drum is working. |
| The pretreatment level of the film is too low. | Check the pretreatment and the age of the film. Use the inline corona treatment. |
| Ink drying is too slow. | Increase the performance of the dryer. Use a faster drying solvent. Reduce the printing speed. |
| The ink volume transferred is too high. | Select anilox rollers with a lower transferred volume. |
| The ink viscosity is too high. | Reduce the ink viscosity by adding solvents. |
| The cooling is not working. | Please contact the service department. |
| Excessive winding pressure at the winder | Reduce the winding pressure. |
| The moisture of the wound web is too high. | Increase the performance of the dryer between the printing mechanisms and reduce the cooling. |
| Coating or pretreatment on both sides of the film. | Check whether the correct ink system is being used. |
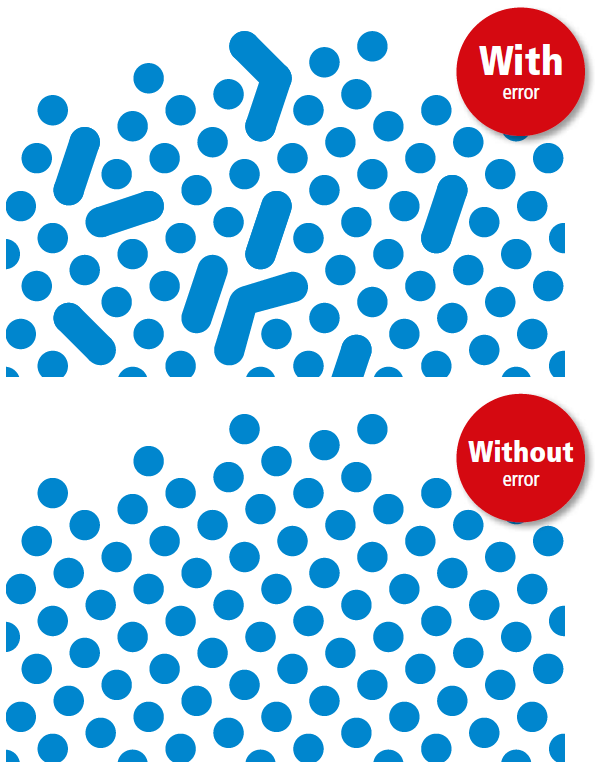
Ink connections between individual screen dots of the printing plate are produced. The intermediate depressions are filled with ink.
| Causes | Remedies |
| The relative humidity is too high. Water is condensing into the solventbased inks. | Replace with fresh ink. Adjust the solvent mixture. Increase the performance of the dryer between the printing units. |
| The ink recipe is not suitable for the printed motif. | Replace the ink. |
| Incorrect selection of the solvent. The ink dries too quickly. | Empty the ink tank and adjust the solvent mixture. |
| The ink viscosity is too high. | Reduce the viscosity. |
| The transferred volume is too high. | For the print job, select anilox rollers with a lower transferred volume. |
| The anilox roller and width of the printing plate raster do not match. | Use a finer anilox roller. |
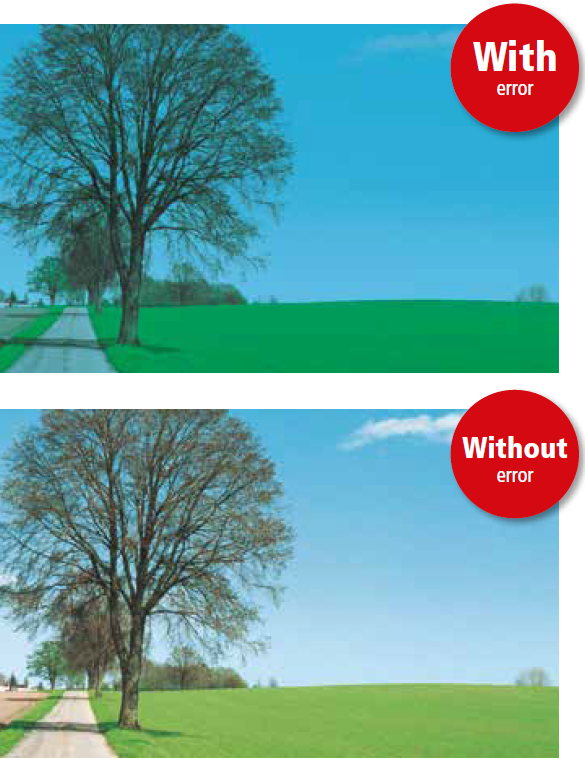
The color strength is too high in comparison to previous prints or samples.
| Causes | Remedies |
| The transferred volume of the anilox roller is too high. | Use an anilox roller with a smaller transferred volume. |
| The ink viscosity is too high. | Add solvent and/or blended inks in order to adjust the ink viscosity. |
| The ink recipe for the color matching is too strong. | Add a blend of inks. Optimize the ink recipe. |
| The settings of the doctor blade are incorrect. | Adjust the pressure of the doctor blade. |
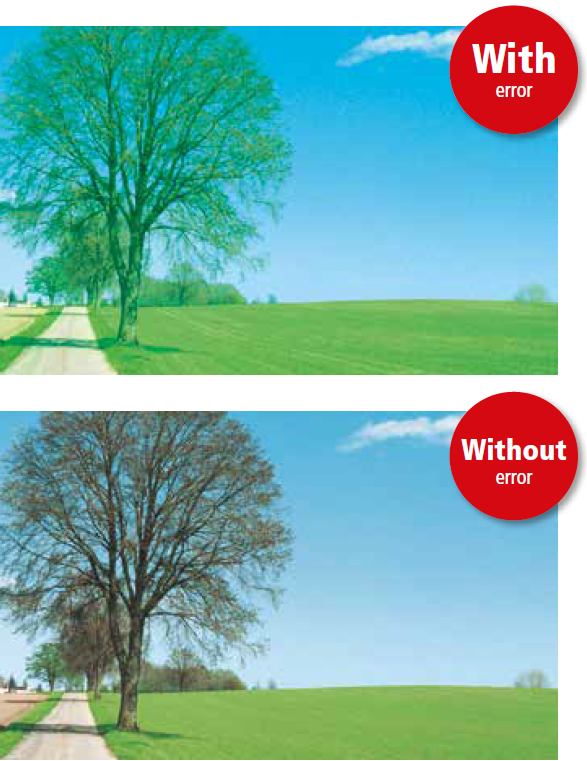
The color strength is weaker in comparison to previous prints or samples.
| Causes | Remedies |
| The ink dries on the anilox rollers. | Clean the anilox roller. The printing pressure is too high or too low between the plate cylinder and the substrate or between the anilox roller and printing plate. |
| The color of the printing ink being used his too weak. | Contact your ink supplier or, if possible, add a concentrated ink. |
| The ink is too thin. | Increase the viscosity with fresh ink. |
| The anilox roller is worn. | Replace the anilox roller. |
| The ink is of incorrect quality. | Replace this with fresh ink. |
| The printing pressure is too high or too low between the plate cylinder and the substrate or between the anilox roller and the plate cylinder. | Adjust the printing pressure. |
| The ink has dried because a machine has been at a standstill for too long. | Clean the printing plate and the anilox roller. |
| An anilox roller has been used whose transferred volume was too small. | Select an anilox roller with a higher transferred volume. |
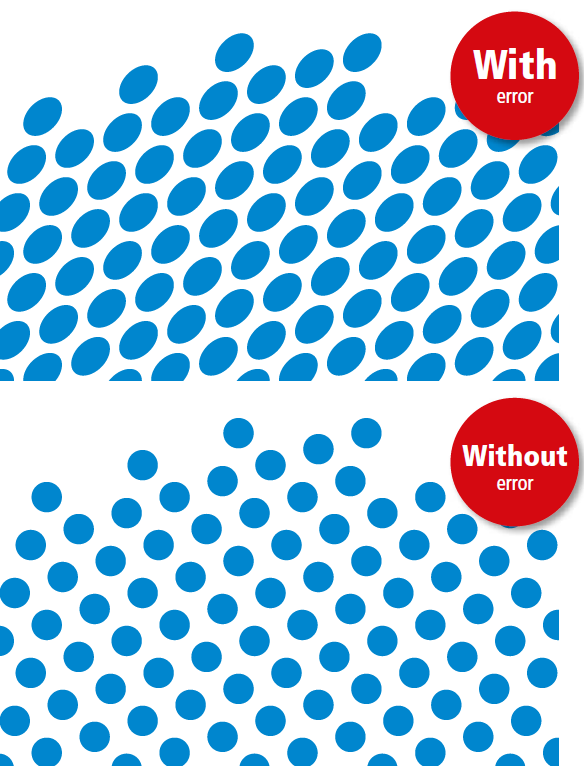
The shape of the screen dot in the print deviates considerably from the original shape.
| Causes | Remedies |
| The pressure setting between the plate cylinder and the substrate is too high. | Reduce the pressure setting. |
| The web tension is too low. | Regulate the web tension. |
| Excessive thickness fluctuations of the printing plate or the double-sided adhesive tape. | Change the printing plate or use a different adhesive tape. |
| The relief depth of the printing plate is too high. | Use a printing plate with a smaller relief depth. |
| There is a speed difference between the plate and impression cylinder. | Check the thickness of the doublesided adhesive tape and the printing plate. |
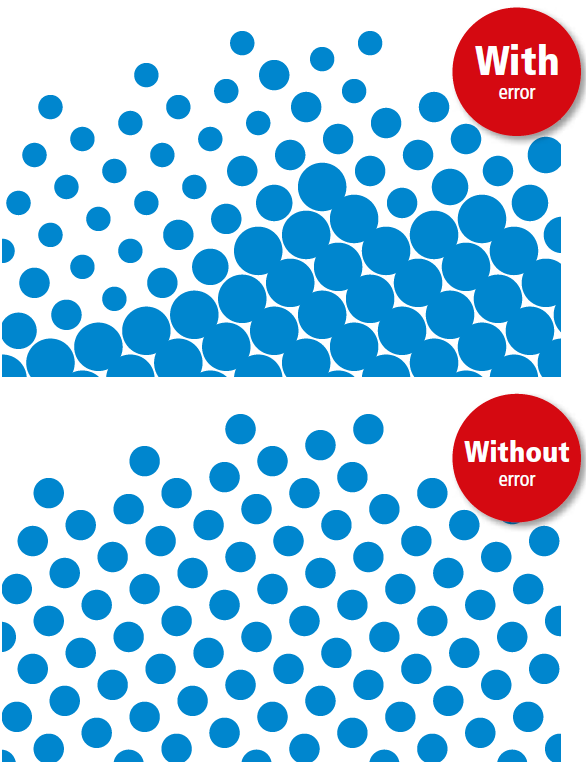
Excessive dot gain on the substrate. This reduces the details and the contrast.
| Causes | Remedies |
| The thickness tolerance of the printing plate or the double-sided adhesive tape is too large. | Change the printing plate or the double-sided adhesive tape. |
| The printing plate is too soft or the double-sided adhesive tape too hard. | Replace the printing plate or the adhesive tape. |
| The pressure setting between the plate cylinder and substrate is too high. | Reduce the pressure setting. |
| The thickness tolerance of the film is too high. | Reduce the pressure of the plate cylinder or replace the roller of substrate. |
| The dot gain has been incorrectly calculated. | Adapt the curve of the dot gain accordingly. |
| The temperature of the central cylinder is too high or too low. | Please contact the maintenance service department. |
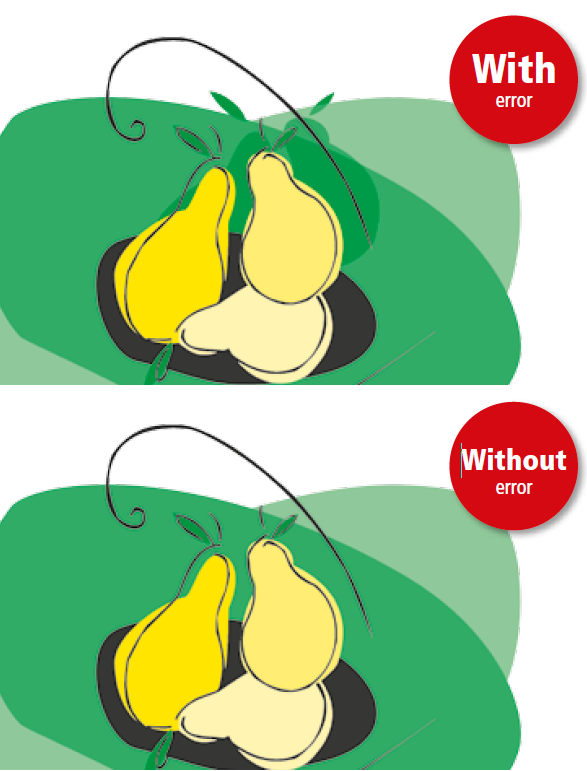
The ghosting effect is a weak printed image that is visible in one part of the motif where it should not be. Usually this effect occurs in the case of a solid print with negative fonts or with windows.
| Causes | Remedies |
| The amount of ink available is too small as the transferred volume of the anilox roller is too low. | Use an anilox roller with a higher transferred volume. |
| The ink dries in the anilox roller cells | Add retarder to the ink. |
| The anilox roller cells are inadequately filled. | Increase the pressure in the chamber doctor blade system. |
| The printing speed is too low. | Increase the printing speed or the viscosity of the ink. |
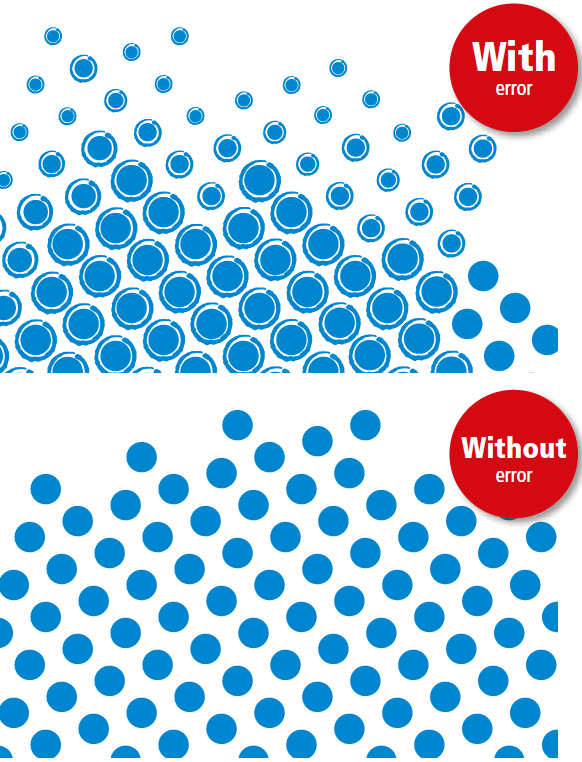
The screen dot is surrounded by a line or a ring.
| Causes | Remedies |
| There is a difference in the speed between the plate and impression cylinder. | Check the thickness of the doublesided adhesive tape and the printing plate. |
| The transferred volume of the anilox roller is too high. | Select an anilox roller with a lower transferred volume. |
| The pressure setting between the plate cylinder and substrate is too high. | Reduce the pressure setting. |
| The pressure of the chamber doctor blade system is too low. | Increase the pressure in the chamber doctor blade system. |
| The pressure setting between the anilox roller and the plate cylinder is too high. | Reduce the pressure setting. |
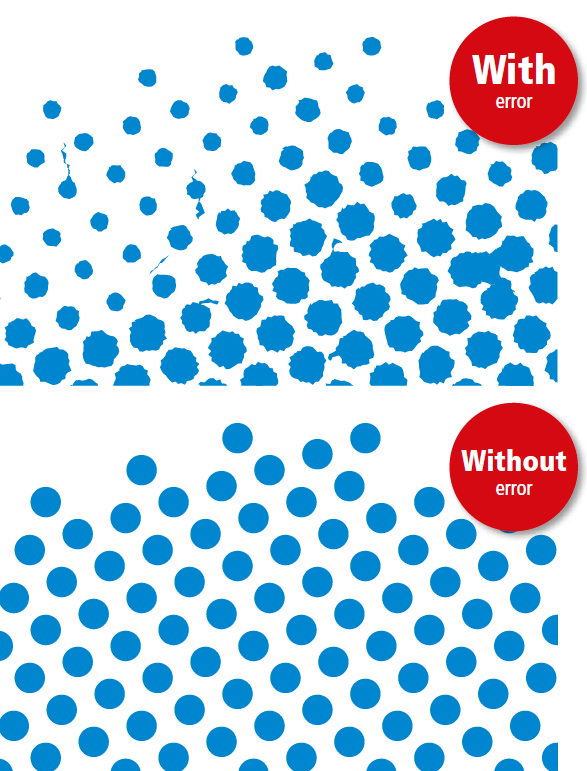
Uneven edges around the screen dot.
| Causes | Remedies |
| The ink dries on the printing plate. | Clean the printing plate and adjust the solvent mixture. Add the retarder. Make sure that the hot air fan is not blowing onto the printing plate. |
| The pressure setting between the anilox roller and the plate cylinder is too high. | Reduce the pressure setting. |
| The ink viscosity is too high. | Adapt the ink viscosity by adding solvents. |
| The lint particles from the cleaning cloth are on the printing plate. | Clean the printing plate. Use a lint-free cleaning cloth or a cleaning brush. |
| The ink recipe is not suitable for the printed motif. | Replace the ink. |
| The pressure setting between the plate cylinder and the substrate is too high. | Reduce the pressure setting. |
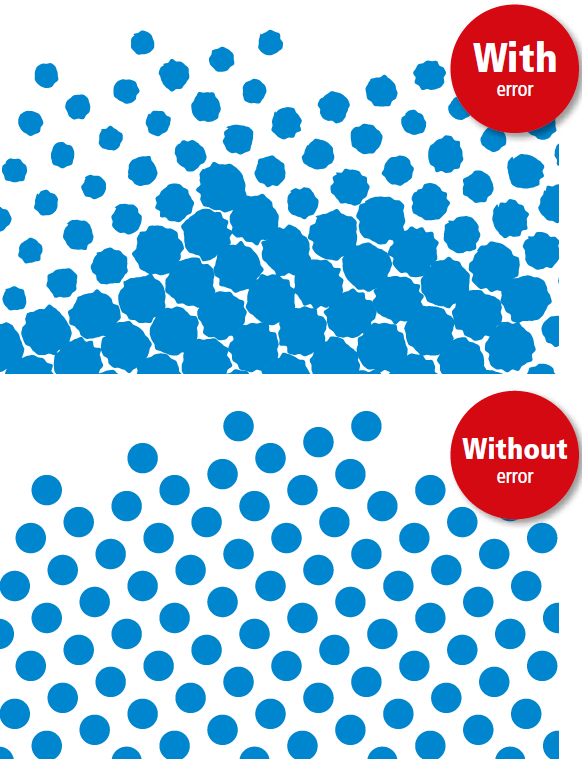
Ink build-up on the relief edge of the screen dot.
| Causes | Remedies |
| The transferred volume of the anilox roller is too high. | Use an anilox roller with a smaller transferred volume. |
| The printing speed is too low. | Clean the printing plate and increase the printing speed. |
| The ink viscosity is too high. | Reduce the viscosity. |
| The wrong solvents were used. | Replace the ink. |
| The pressure setting between the plate cylinder and substrate is too high. | Reduce the pressure setting. |
| The ink recipe is unsuitable. | Replace the ink. |
| The printing plate is worn, the relief depth is too small. | Replace the printing plate. |
| The relative humidity is too high. The water condenses into the solventbased ink. | Adjust the solvent mixture – use retarder and anhydrous solvent. |
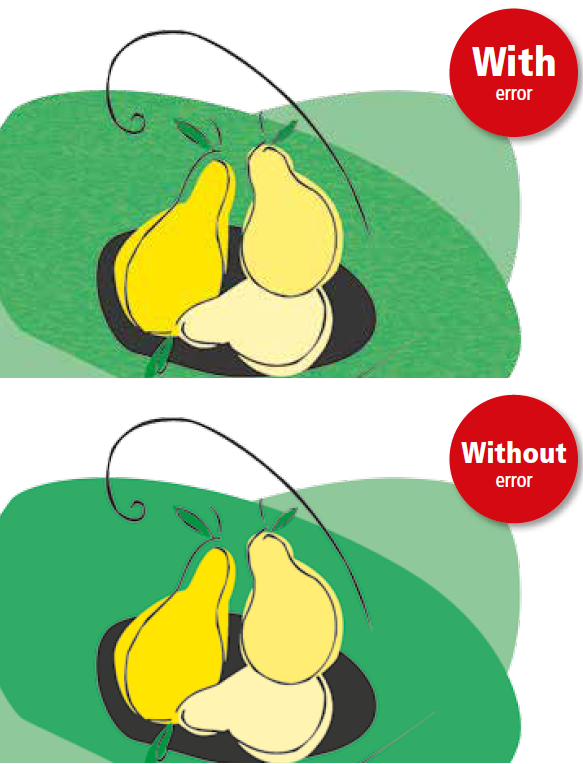
Dotted or marbling printed image of the solid printing area. Weak ink strength, grainy large-format printing.
| Causes | Remedies |
| The surface of the printing plate is cloudy/uneven. Damage to the surface of the printing plate can be seen. | Create a new printing plate. |
| The viscosity of the ink is too low. | Add fresh ink and/or a blend of inks and ensure that the resulting viscosity is appropriate. |
| There are foreign bodies or impurities on the plate cylinder or the anilox roller. | Clean the plate cylinder carefully. |
| The surface of the substrate is uneven. | Use softer printing plates. |
| The film surface is soiled. | Filter the ink or use fresh ink. |
| The ink viscosity is too high. | Add solvent to the ink. |
| The doctor blade pressure is too high or too low. | Adapt to the doctor blade pressure accordingly. |
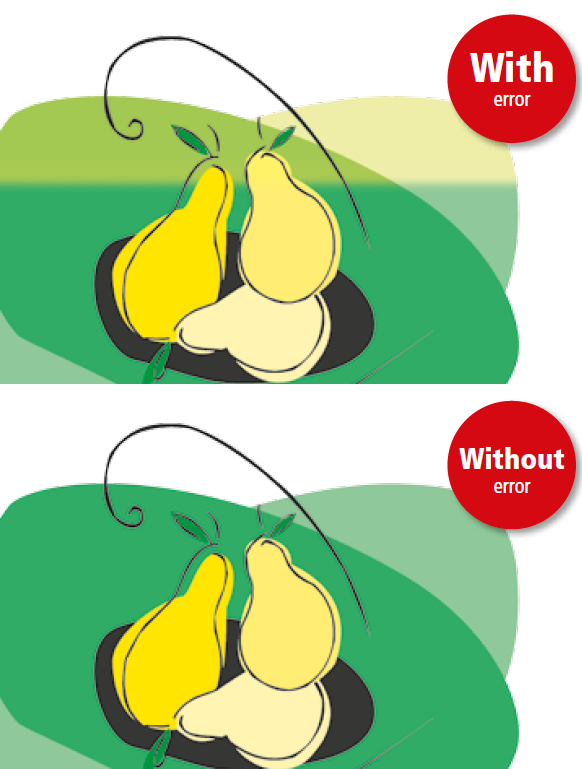
Lack of contact between the substrate and the printing plate or between the printing plate and anilox roller results in the poor transfer of ink.
| Causes | Remedies |
| The thickness fluctuations in the printing plate or double-sided adhesive tape are too large. | Change the printing plate or the double-sided adhesive tape. |
| The printing pressure is too low. | Increase the pressure between the plate cylinder and anilox roller or between the plate cylinder and the substrate. |
| The thickness of the substrate is out of tolerance. | Increase the delivery pressure of the plate cylinder or replace the reel of substrate. |
| The plate cylinder or the anilox roller are imbalanced. | Check the running of the printing plate cylinder (concentricity etc.). |
| The transferred volume of the anilox roller is too low. | Increase the anilox roller volume. |
| The filling level of the chamber doctor blade is too low. | Increase the ink level in the chamber doctor blade. Check whether the ink pump is working correctly. |
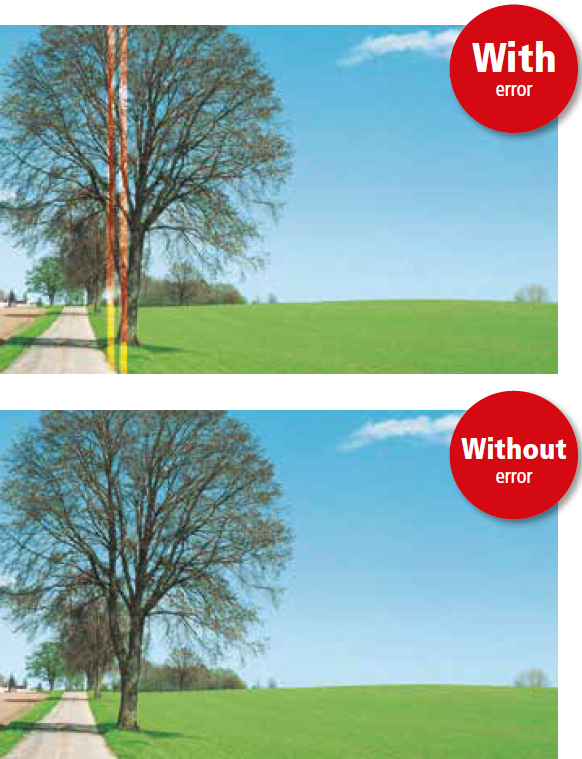
Printing error owing to parallel lines in the direction of printing.
| Causes | Remedies |
| The doctor blade is worn. | Replace the doctor blade. |
| There is dried ink on the doctor blade. | Clean the doctor blade. |
| The anilox roller is damaged. | Replace the anilox roller. |
| The anilox roller is blocked or the drive of the anilox roller is faulty. | Please contact the maintenance service department. |
| The anilox roller is dirty or the ink on the anilox roller has dried. | Clean the anilox roller. |
| There are particles in the ink. | Clean the pump system, printing plates, doctor blade and anilox roller after you have filtered the particles out of the ink. |
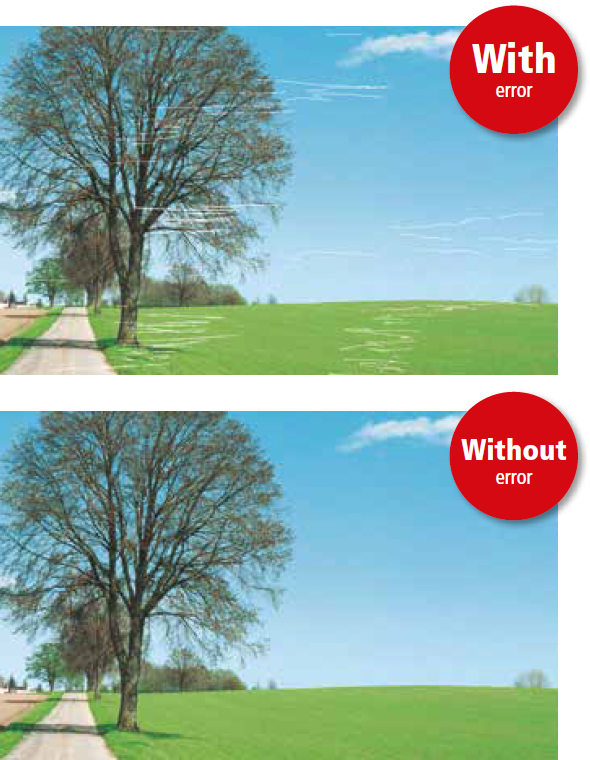
Insufficient mechanical resistance of the print. Further information can be found in our brochure 'Rapid tests and test methods for production control in packaging printing'.
| Causes | Remedies |
| The ink recipe is not suitable or the ink is damaged. | Empty the ink tank, clean the ink feed system and replace the ink. |
| The transferred volume of the anilox roller is too low. | Replace the anilox roller. |
| An unsuitable solvent has been selected. | Use fresh ink with the appropriate solvent mixture. |
| The corona pretreatment of the film is insufficient. | Use inline corona pretreatment. |
| The abrasion resistance is poor. | Add a wax additive to the ink. |
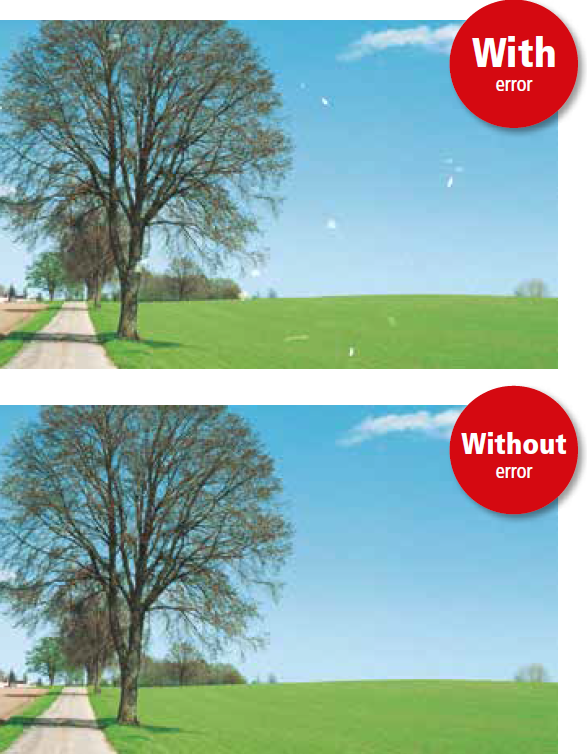
Dust particles on the substrate cause spots and defects. This is the case with solid printing, where dark spots are surrounded by a white 'halo'.
| Causes | Remedies |
| The feed is dirty. | Clean the feed. |
| The printing plate is dirty or the surroundings are too dusty. | Clean the printing plate. |
| There are foreign particles in the doctor blade chamber. | Clean the ink feed system. |
| The substrate is statically charged. | Use antistatic rollers if possible, or replace the reel of substrate. |
| The substrate is dirty. | Change the substrate. |
| The feed rollers are dirty. | Clean the feed rollers. |
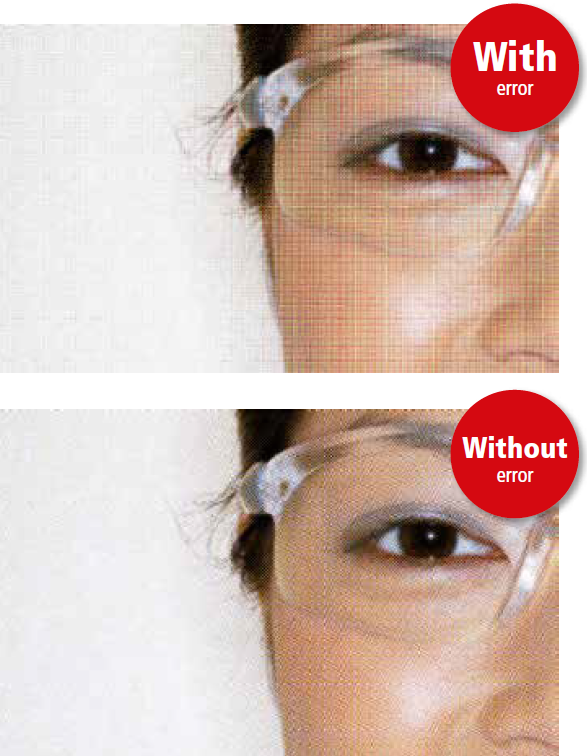
In the overprinting of the process colors (CYMK) the individual grid structures can interact and create a pattern. The type of interaction can create an undesirable interference pattern , the so-called moiré effect.
| Causes | Remedies |
| The screen angle on the printing plate is wrong. | Adjust the screen angle in the preliminary stage. |
| The ratio between the line number of the anilox roller and the screen frequency of the printing plate is too low | The ratio should be greater than 4; use at least a 200 anilox roller, for example, for a 48 plate raster. |
| The ink dries on the anilox roller. | Clean the anilox roller. Add retarder to the ink. |
| The anilox roller angle and the screen angle on the printing plates is incorrectly adjusted. | Change the anilox roller or revise the repro with more suitable screen angles. |
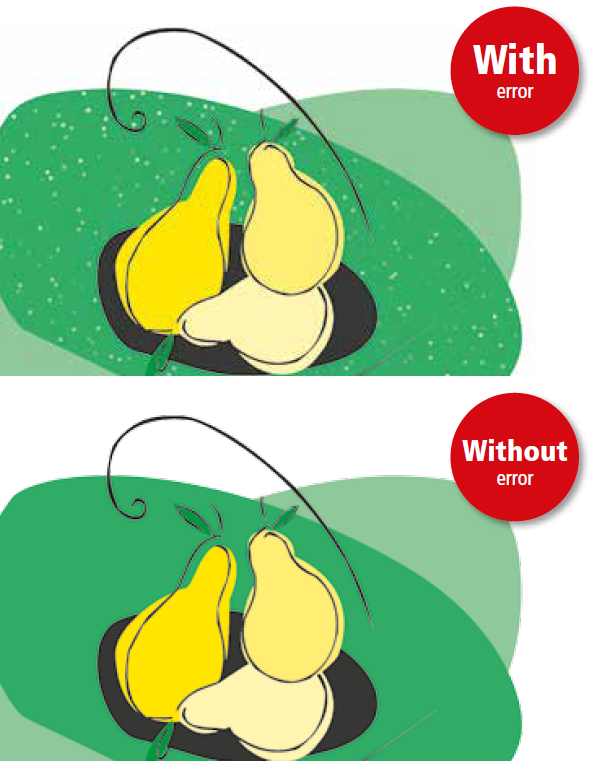
Small bright points in the solid print area.
| Causes | Remedies |
| The surface of the film or printing plate is uneven. | Increase the pressure setting or replace the film or the printing plate. |
| The substrate is unevenly wetted. | Use more appropriate material to be printed on or increase the ink layer thickness through a higher viscosity or by exchanging the anilox roller. |
| The ink foams. | Add defoaming agent. |
| The pH value of the water inks is too low. | Carry out pH value correction. |
| An inappropriate white ink has been selected. | Use an appropriate white ink. |
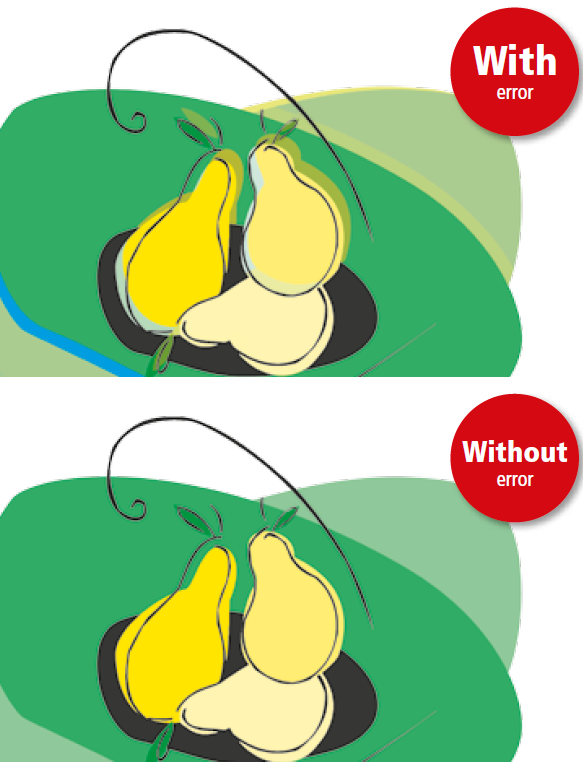
In combined printing the individual colors are not congruent with one another.
| Causes | Remedies |
| The printing plate has been incorrectly mounted. | Repeat the mounting procedure for the printing plate. |
| The dryer temperature is too high. | Reduce the temperature of the Intermediate ink dryer. |
| The tensile stress of the printing substrate web is incorrectly adjusted. | Check the web tension, as well as the feed and the winder. |
| The thickness fluctuations of the substrate are too high. | Replace the reel of substrate. |
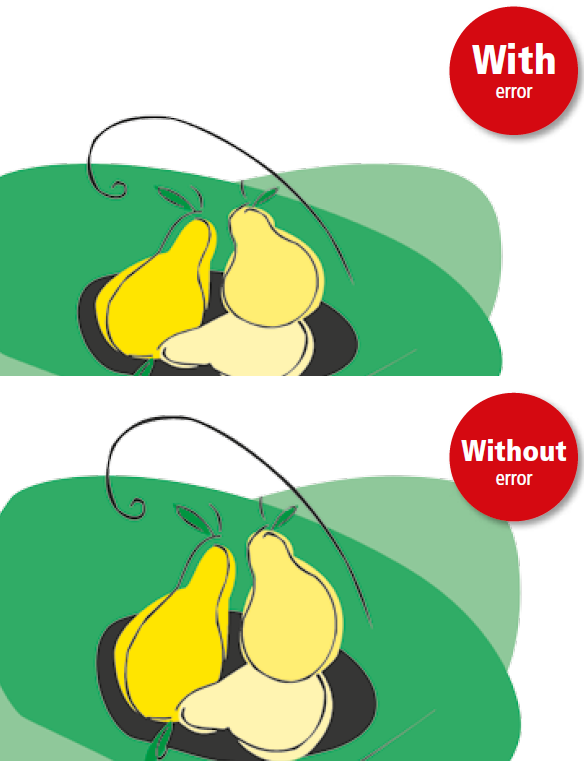
The printed motif in the direction of printing is too short or too long.
| Causes | Remedies |
| The web tension is too high or too low. | Adjust the web tension in accordance with the properties of the substrate. |
| The thickness deviation of the substrate is too large. | Change the substrate. |
| The temperature in the tunnel dryer is too high. | Reduce the temperature in the tunnel dryer. |
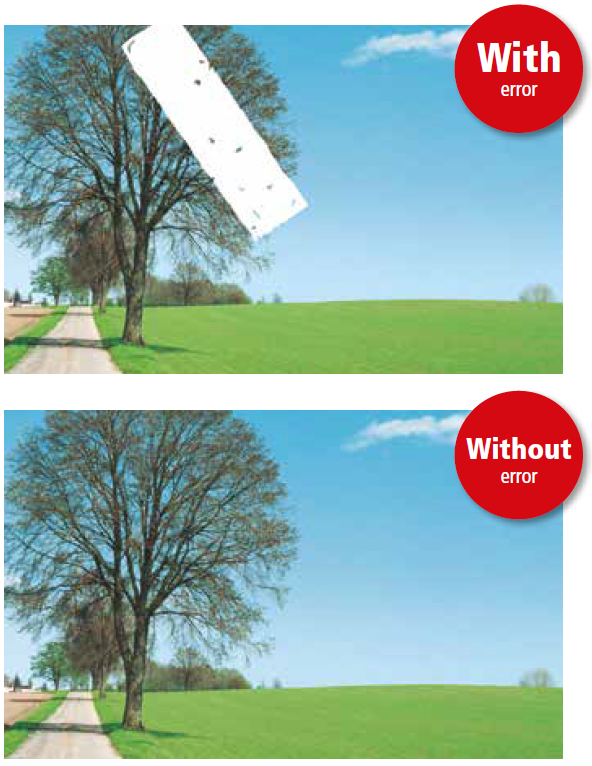
The ink does not pass the adhesive tape test. There is insufficient adhesion of the ink to the substrate.
| Causes | Remedies | ||
| An inappropriate ink formulation or incorrect ink system was used. | Please ensure that the correct ink system is used. | ||
| The corona pretreatment level of the film is too low. | Check the pretreatment and the age of the film. | ||
| The pH value of the water inks is much too low in the case of prolonged printing times. | Please use fresh ink. Ensure that the correct solvents are used. | ||
| The adhesion between colors is insufficient. | This can occur if two different ink systems are printed one over the other. Ensure that the ink build-up is appropriate. | ||
| The film surface is soiled. | Apply an appropriate primer before you begin printing or change to a more suitable film batch. | ||
| The ink viscosity is too low. | Increase the viscosity with fresh ink. | ||
| Multiple color build-up | Please ensure that the ink that is first applied displays good initial adhesion and is not dissolved by the following ink. | ||
| The wrong side of the film has been printed. | Check the side of the film. |
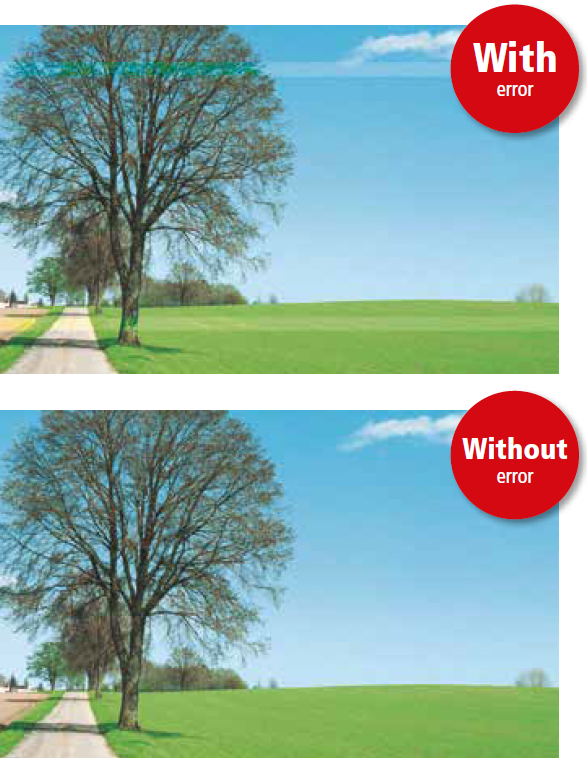
Incorrect printing owing to lines that are perpendicular to the line of printing.
| Causes | Remedies |
| The diameters of the printing plate cylinder and the gear used do not match. | Check the amount of unwound material. |
| The pressure setting between the plate cylinder and the substrate is too high. | Reduce the pressure setting. |
| The printing speed is too high. | Reduce the printing speed. |
| The printing pressure between the anilox roller and the printing plate is incorrect. | Adjust the printing pressure. |
| There is a mechanical fault. | Check the mechanical parts of the printing machine. |